Recently, a friend introduced me to Arduino. Rather, he’s been trying to introduce me for a while and I’ve just been too darned busy to play with it.
So, I took on some projects and spent some energy on it this last month.
First up, Meggy Jr from evil mad scientist.
Not really an arduino, it was a great way to warm back up to soldering and electronics. The entire kit took about two hours to assemble, and requires some hand tools as outlined in the manual. I went ahead and picked up a tool kit from SparkFun as my old soldering iron has seen better days – which is another interesting (albiet expensive) electronics company I have purchased from in the past.
At the same time, I also purchased an Arduino Esplora + TFT from CanadaRobotix – but more on that later.
Shipping times
Evil mad scientist shipped the fastest, CanadaRobotix was just 1 day behind. And sparkfun was a few days behind.
Tools you will need
- Soldering iron + solder
- Angle flush cutters – I like mine not to be perfectly flush, but bump/raised in the bottom. This way when you cut wires it leaves the solder untouched while cutting wires on the board.
- Pointy pliers – you need them really pointy for the transistors.
- 3xAAA batteries (optional actually)
Recommended
- 1 switch – there is a jumper to switch from battery to wall power. I swapped this with a toggle switch because the jumper will be hard to reach later. This is 3 pin #8 in the manual, a 90 degree 3 pin header. Replacing this with a 3 pin toggle switch is very easy.
- Resistor lead former – you will be bending many resistors.
- Wire strippers as there are a couple wires I needed to modify.
Build time
It took me around two hours. The instructions are beautiful and easy to follow with clear diagrams. It starts you off soldering big joints and working your way up to harder ones. Once assembled it has a game already installed.
Programming
It uses the Arduino IDE and development kit. They have plenty of samples.
I use a Surface Pro + Mythlogic laptop for my coding. The programs are shared among all my computers using SkyDrive and backed up to a large data box with daily snapshots. But I also have 25GB of code for different platforms, languages, systems, etc. The surface pro is very helpful which arduino.
What it looks like
After all was said and done – I loved this little package. It was a blast to assemble (couple of episodes of X-files on Hulu) and I highly recommend it. As for child friendly, it involves detailed work and a hot soldering iron. I would have loved this in my teens (11-16) but you want to keep an eye on the kids (forgetting to turn off a soldering iron is bad). But don’t quote me on this part as I am no expert on this ![]() .
.
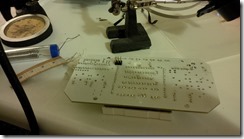
Partially assembled.
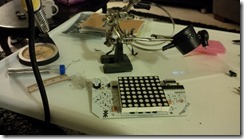
Front partially assembled.
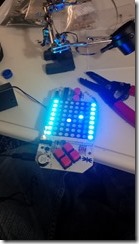
Power testing.
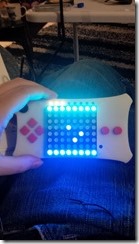
Success!
Later, I will post my RPG source code for my Esplora game ![]()
